
This article explains every part of the Members list so you can find a member quickly and know what each status and menu choice means. Owners and Org Admins see the list when they click Members in the left nav.
When would you use this?
- A resident calls and you need to find their record by name or email.
- You want to see which members have never logged in so you can follow up on their invitations.
- You need to understand why a member does not appear in the list or what a status badge means.
What the list shows
The top of the page has a Search box, a Filter button, a Sort button, and a List Actions button. Under them, "Showing: 20 of 23" tells you how many members are loaded out of the total that match your search and filter, and "Selected" counts the members whose box you have checked.
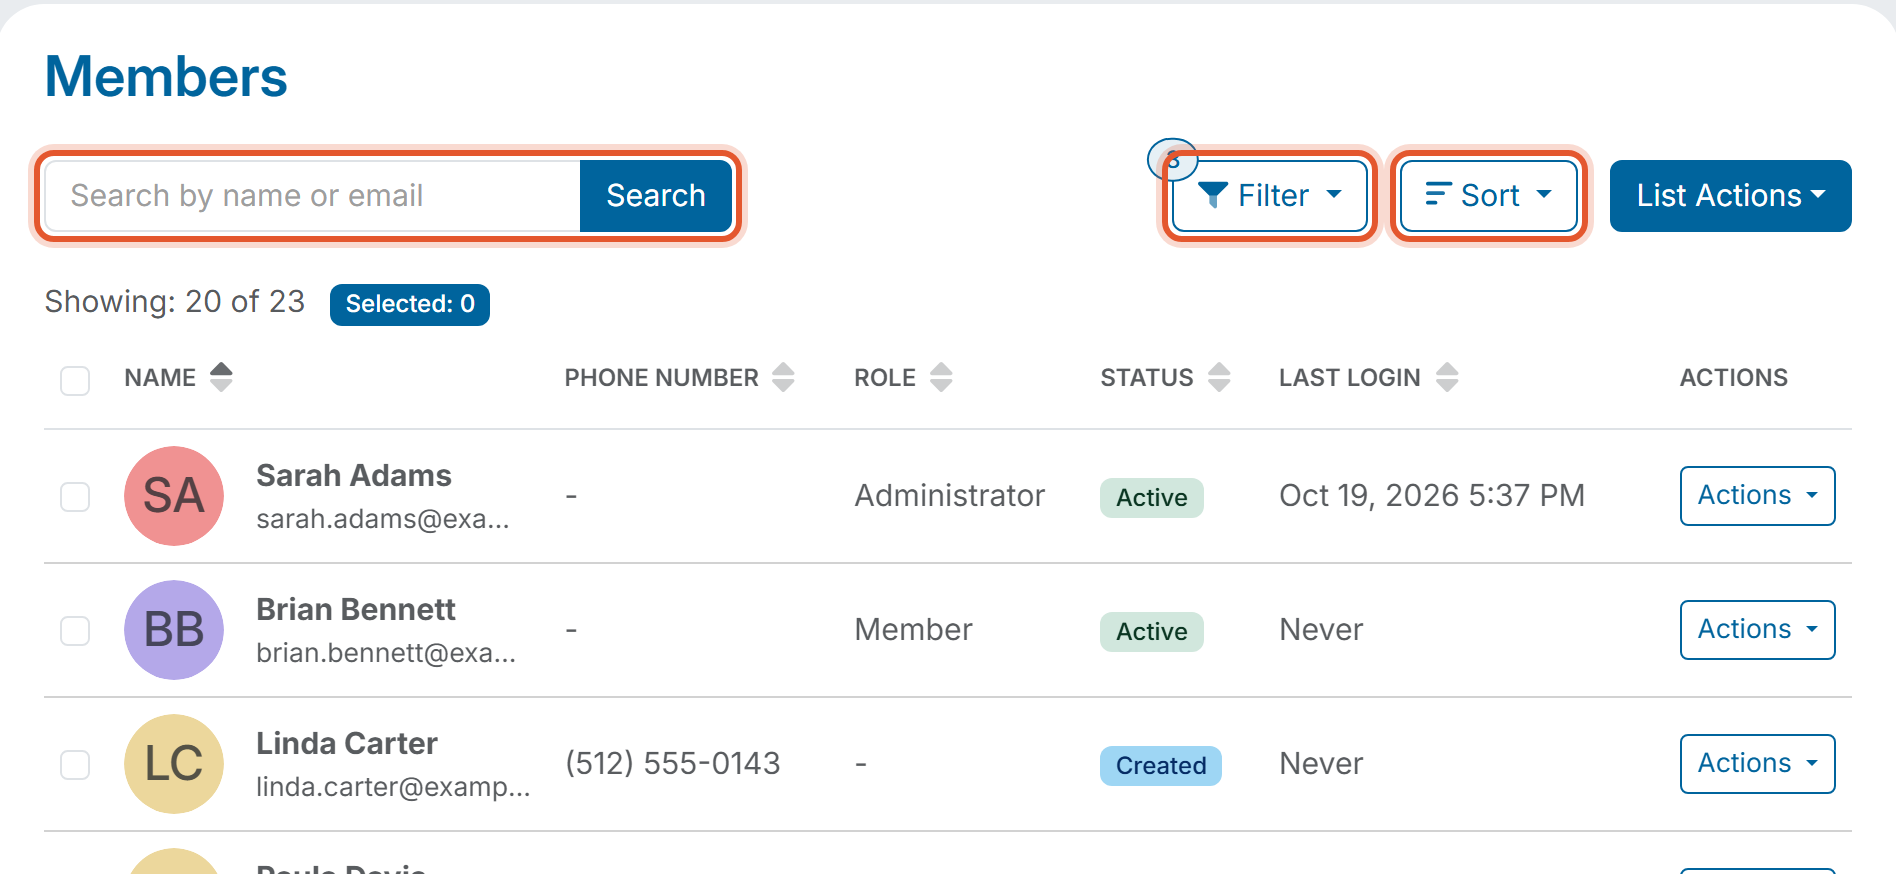
The table has these columns:
- NAME: the member's initials, full name, and email address.
- PHONE NUMBER: the phone number on the member's record, or a dash if there is none.
- ROLE: Member, Administrator, or Owner. A dash appears for newly added members.
- STATUS: where the member is in the invitation and access process (see the list below).
- LAST LOGIN: the date and time of the member's most recent login, or "Never" if they have not logged in.
- ACTIONS: a menu of things you can do for that member.
The list loads 20 members at a time. Scroll down inside the list and the next members load until the count reads, for example, "Showing: 23 of 23". There is no page-number control or Load More button.
Search, Sort, and Filter
- Search: type part of a member's name or email address in the Search box, then press Enter or click Search. Searching for part of an email address, such as the text before the @, finds that member. When nothing matches, the list shows "No results found".
- Sort: click Sort and choose Name, Email, Phone Number, Role, Status, or Last Login, each with an Ascending and a Descending choice. You can also click a column heading (NAME, PHONE NUMBER, ROLE, STATUS, or LAST LOGIN) to sort by that column, and click it again to reverse the order.
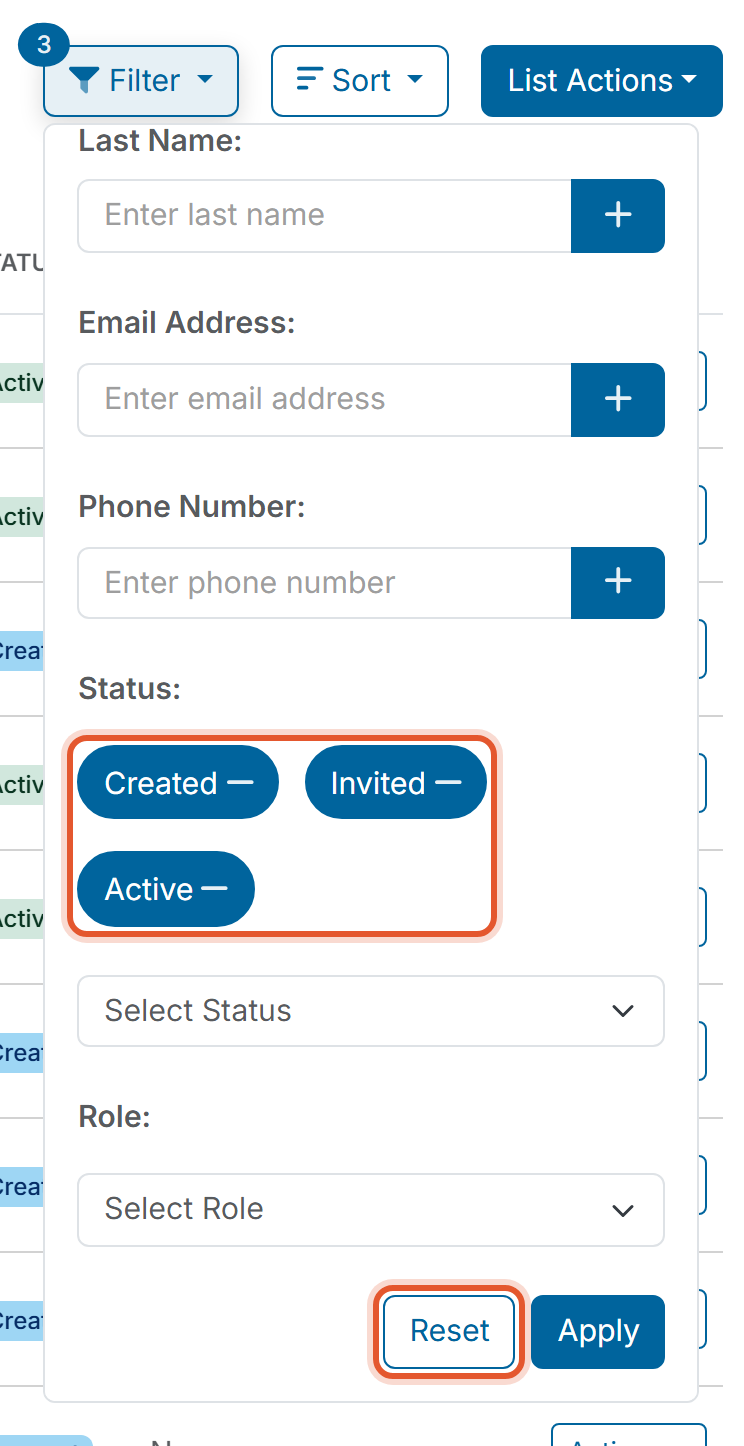
- Filter: click Filter to open Filter Options, where you can narrow the list by First Name, Last Name, Email Address, Phone Number, Status, and Role. Click Apply to update the list.
The Status section starts with three choices already selected: Created, Invited, and Active. The number on the Filter button (3) counts them. Click a choice to remove it, or pick another status such as Expired or Deactivated from the Select Status menu to add it. Click Reset to return to Created, Invited, and Active.
What each status means
- Created: the member's record exists, but you have not sent an invitation.
- Invited: you sent an invitation and the member has not accepted it yet.
- Expired: the member's invitation is no longer pending. A member's status becomes Expired when you uninvite them. You can send an Expired member a new invitation.
- Active: the member has an account that is turned on.
- Deactivated: you turned the member's account off.
The Actions menu on each row
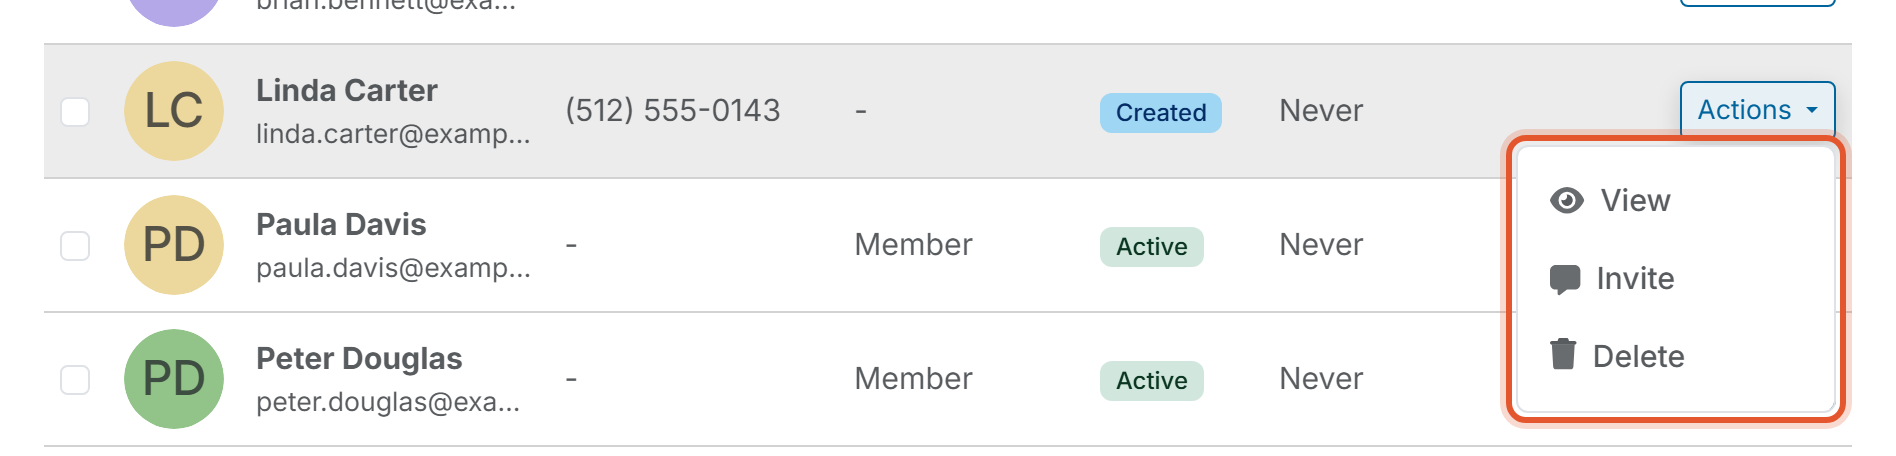
Click Actions at the right end of a row. The choices depend on the member's status.
- Active: View, Deactivate, Delete.
- Created: View, Invite, Delete.
- Invited: View, Uninvite, Delete.
- Expired: View, Invite, Delete.
- Your own row: View only.
Good to Know
- To open a member's profile, click Actions on their row and choose View. Clicking the member's name does not open the profile.
- A member whose status is not selected in the Filter does not appear in the list. If a member seems to be missing, check the Status choices in the Filter or click Reset.
- To act on several members at once, check their boxes and use List Actions.