
Adding a member to the system and giving them a working login are two separate steps. Adding a member (see "How Do I Add a New Member to an Organization") only creates their record. Inviting them is what actually sends the email that lets them set their own password and log into their portal.
Understanding member status
After a member is added, the Members list shows a Status badge for each person. Values you may see include:
- Created — the member record exists but they haven't been invited yet, and haven't set up their own login.
- Invited — an invitation email has been sent, but the member hasn't finished setting their password yet.
- Active — the member has completed sign-up and can log in.
- Expired — a previous invitation is no longer valid. Choose Invite from the member's row-level Actions menu to send a new one.
- Deactivated — the member's access has been turned off. See How Do I Activate or Deactivate a Member?
A member showing Created has a row-level Actions menu with only three options: View, Invite, and Delete.
Steps to send an invite
- From the Members list, find the member (Status shows Created), and open their row-level Actions menu.
- Choose Invite.
- Confirm in the dialog that appears: "Are you sure you want to send an invitation to [Name]?" Click Send Invitation to proceed, or Cancel to back out.
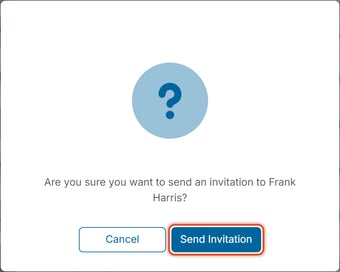
You can also send an invitation from a member's profile (Actions > Send Invitation), or select several Created members and choose Invite from List Actions.
Once sent, a few things happen right away:
- The member's Status badge changes from Created to Invited.
- Their row-level Actions menu changes from View / Invite / Delete to View / Uninvite / Delete. (Uninvite reverses the invite — useful if you clicked Invite on the wrong person.)
- A confirmation toast appears reading "Member invitation email has been sent successfully."
Canceling an invitation
If a member was invited by mistake or shouldn't have portal access yet, open their row-level Actions menu and choose Uninvite.
Checking whether the email actually arrived
If a member says "I never got my invite," check Message Center > Email History. Every invitation email shows up there with a delivery status such as Delivered or Opened. See "Understand Email Status Values" for the full list of possible statuses and how to read that log.
What the member sees
The invitation email contains a Join button. Clicking it takes the member to a "Set Your Password" screen with the subtext "Create a secure password for your new account," a New password field, a Re-enter new password field, and a Set Password button. For the rules a new password must meet, see What Are the Member Password Requirements.
Each invite link is single-use. Once a member finishes setting their password, the same link cannot be reused — reopening it lands on a "Member invitation already accepted" page with a Return to Login button instead of the password screen. If a member needs to set up their account again (for example, they didn't finish the first time, or the link expired), send a fresh Invite from their row-level Actions menu rather than reusing an old email.