
The Invoice Dashboard's List Actions menu applies to a whole set of invoices at once rather than one invoice at a time. Export Filtered Data applies to every invoice currently shown by your filters/search, whether or not you've checked any rows. Waive Late Fees and Resend Invoices act on the invoices you have checked (the Selected: N count next to Showing: shows how many). Resend Invoices is greyed out when Selected is 0. Waive Late Fees is listed only when your selection includes at least one invoice that has an applied late fee.
When Would You Use This?
- You want a spreadsheet of a specific slice of invoices — for example, every Late invoice for a given property — to share with the board or reconcile against your own records. That's what Export Filtered Data is for.
- A batch of invoices picked up late fees because of a billing mistake or a grace period the board wants to honor, and you need to remove those fees from several invoices at once instead of one by one. That's what Waive Late Fees is for.
How to Get There
- Go to Balances > Invoice Dashboard.
- Optionally use Search or Filter to narrow the list to the invoices you care about. Then check the boxes next to the invoices you want to act on. The checkbox in the table header selects or clears every invoice that matches your filters, including invoices not yet shown on the page.
- Click List Actions.
The menu also includes Resend Invoices, which re-sends the invoice notification email for the selected invoices — it's covered in its own article: "How Do I Resend Invoices".
Exporting Filtered Invoice Data
- With the invoices you want visible/selected, click List Actions > Export Filtered Data.
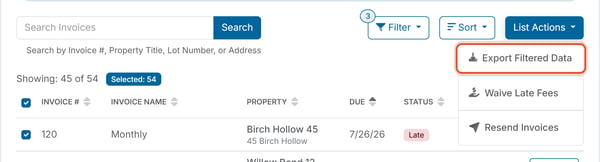
- The browser downloads a CSV file (named like "Invoice-data-[date].csv") containing the invoices currently shown by your search/filter.
Use this when you need the data outside the platform — in a spreadsheet, or to hand to someone who doesn't have a login.
Waiving Late Fees in Bulk
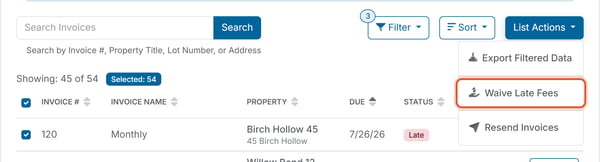
- Check the box next to each invoice you want to waive fees on. Waive Late Fees only acts on invoices you have checked, and it appears in List Actions only when at least one of them has a late fee. The Late Fees column (visible on wide screens) shows the fee on each invoice.
- Click List Actions > Waive Late Fees.
- A confirmation dialog asks: "Are you sure you want to waive late fees on [N] selected invoice(s)? Paid invoices in the selection will be skipped." You can optionally add Notes.
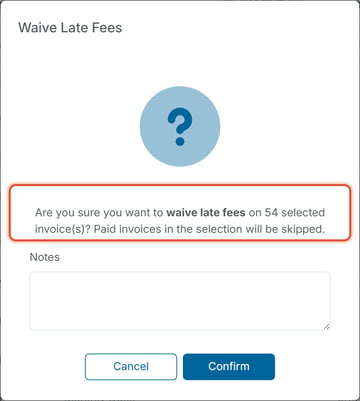
- Click Confirm to remove late fees from every eligible invoice in the selection.
Each member whose invoice had its late fee waived this way receives a "Late Fee Removed" automated email — see "What Are the Automated Email Types?"
Waiving Late Fees on One Invoice
- Go to Balances > Invoice Dashboard.
- Find the invoice and click Actions on its row.
- Click Waive Late Fees. This option appears only on Open or Late invoices that have a late fee applied. For the full steps with screenshots, see How Do I Waive the Late Fee on a Single Invoice?.
- A confirmation dialog asks: "Are you sure you want to waive all applied late fees on Invoice #[number]? This reverses the applied fees but does not stop future scheduled fees from applying." You can optionally add Notes.
- Click Confirm.
Good to Know
- Waive Late Fees automatically skips invoices in your selection that are already Paid — you don't need to filter those out yourself first.
- There's no equivalent "add late fees in bulk" list action — late fees are added by the platform's own late-fee rules.
Note: Waiving late fees removes the fee amount from the invoice; it does not undo or reverse any payment that's already been made.