
This article shows you how to delete an Invoice Schedule so it never bills again. Owners and Org Admins can do this from Balances > Invoice Schedules.
Steps
- Go to Balances > Invoice Schedules.
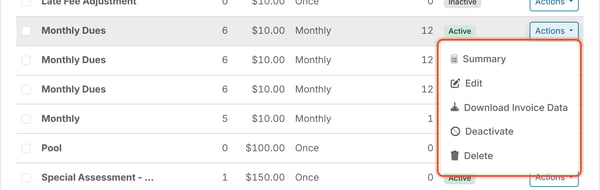
- Click Actions on the row of the schedule you want to stop, then click Delete.
- In the confirmation dialog, optionally check "Void Open and Late invoices that have been created by this Invoice Schedule" (unchecked by default). The "Send email notifications" checkbox is only enabled if the void checkbox is checked. You can also type an optional note in the Notes field.
- Click Yes to confirm.
What You'll See
Delete stops the schedule from ever billing again. It does not remove the row from the Invoice Schedules list: the schedule stays visible with its Charge Status flipped to Deleted, so the history of what it billed is preserved. A Deleted schedule's row still offers Summary, Edit, and Download Invoice Data, but no Reactivate.
Good to Know
- Invoices the schedule already created stay on the Invoice Dashboard.
- Delete can show as greyed out/unavailable on some schedules. If Delete is disabled on a schedule you need to stop, use Deactivate instead; it's always available on an Active schedule regardless of what it has already billed. See How Do I Deactivate or Reactivate an Invoice Schedule?