
Use Void when an invoice should never have gone out at all — for example, a special assessment accidentally applied to the wrong property, or a duplicate charge created by mistake. Void appears on invoices whose Status is Open or Late; Paid and Voided invoices do not offer it. A voided invoice stays in the system and shows when you filter the Invoice Dashboard by the Voided status.
How to Void an Invoice
- Go to Balances > Invoice Dashboard.
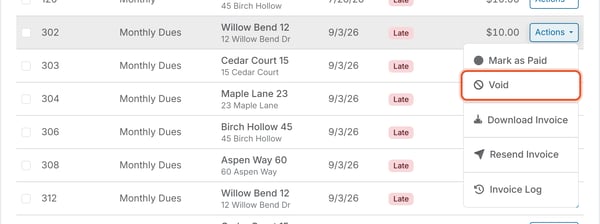
- Find the invoice, open its row's Actions menu, and choose Void.
- A confirmation dialog asks "Are you sure you want to mark Invoice #[n] as Void?" It includes an optional Notes field and a Send email notification checkbox, checked by default. Leave it checked to notify the member that the invoice no longer applies; clear it to skip the email.
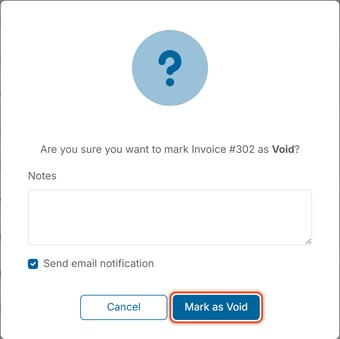
- Click Mark as Void, then confirm again in the follow-up dialog.
What happens after voiding
A voided invoice drops off the default Invoice Dashboard list, which shows Open, Late, and Pending invoices. To see voided invoices, open Filter, choose Voided in the Status list, and click Apply.
Can I delete an invoice schedule instead?
Yes — the schedule row's Actions menu also offers Delete, which stops any future invoices from being generated (see “How Do I View and Manage Invoice Schedules?” for the confirmation steps). Delete doesn't remove the schedule from the Invoice Schedules list — it flips the schedule's Charge Status to Deleted and leaves the row in place for the record. Invoices the schedule already created remain on the Invoice Dashboard unless you also check the option to void them. If a schedule should keep existing but simply stop billing, the row's Actions menu offers Deactivate as a lighter-touch alternative — it flips the Charge Status to Inactive without deleting the schedule record.